I just sent this email over to elegoo official, so either way I’ll update this post with their response for a community reference point:
"Hello, I’m having issues with my Elegoo Neptune Pro 4. I’ve tried following the official documentation and other resources to help fix my issue to no avail, so I am reaching out as a last ditch effort.
My issue mainly pertains to PLA prints consistently being ruined partway during printing after a few months of use and operation.
Specifically, my print will successfully complete the first few layers. Then, at some point, the print will somehow ‘grab’ or ‘catch’ the print base and drag it around the print bed, ruining the print and causing a large build up of filament at my hotend. This then requires cleaning.
From what I have seen, this can be caused by issues with the print bed not being clean or the temperature of the bed in relation to the fan speed. For example, having a low fan utilization at the beginning, then ramping up later in the print is supposed to help this issue. However any fixes I tried returned null results.
Some background info, I purchased the printer on preorder and received it in September 2023. I have kept up with maintenance. Namely, keeping stepper motor tracks cleaned and greased properly, belts tightened, the print bed is wiped down with 90% ISO alcohol between prints. I have replaced the hot-end when I first started experiencing print issues, and again during the troubleshooting process to further diagnose the problem. My Z offset seemingly is “correct”. I followed the mfg instructions closely, and before this issue, my prints were coming out beautifully.
Print Settings: Using Elegoo brand PLA 1kg filament rolls. Default Elegoo Cura print settings applied for temperature, speed, fan speed, nozzle size, etc. Supports or No supports didn’t make a difference during my troubleshooting. Brim printing mode is my default.
For the 4-5 months that I’ve had the Neptune Pro 4 has been absolutely amazing. Fantastic quality, consistent, very easy to use and maintain. The issues I’m experiencing are beyond annoying and I can’t seem to figure it out myself.
Is this issue known? What are the recommended solutions?"
- Let me know if any of you have experienced something similar to this and how you addressed it!
EDIT: This is likely solved. There are many issues that can contribute to this issue but TLDR quadrouple check your z offsets. Read the thread for other good info.
Have you tried drying your filament? Wet filament can cause poor bed adhesion.
Hmm. I don’t have a specific filament dryer. I saw that this was recommended, but I wasn’t having any perceiveable issues with wet filament before this problem.
To troubleshoot I tried ordering ‘fresh’ filament from 3 total brands. Some seemed to print longer than others but still would ruin the print eventually by catching on the base print. This was heartbreaking because I really thought this could have bene the fix.
Will look into improving my storage long term so this can be crossed out as a potential issue.
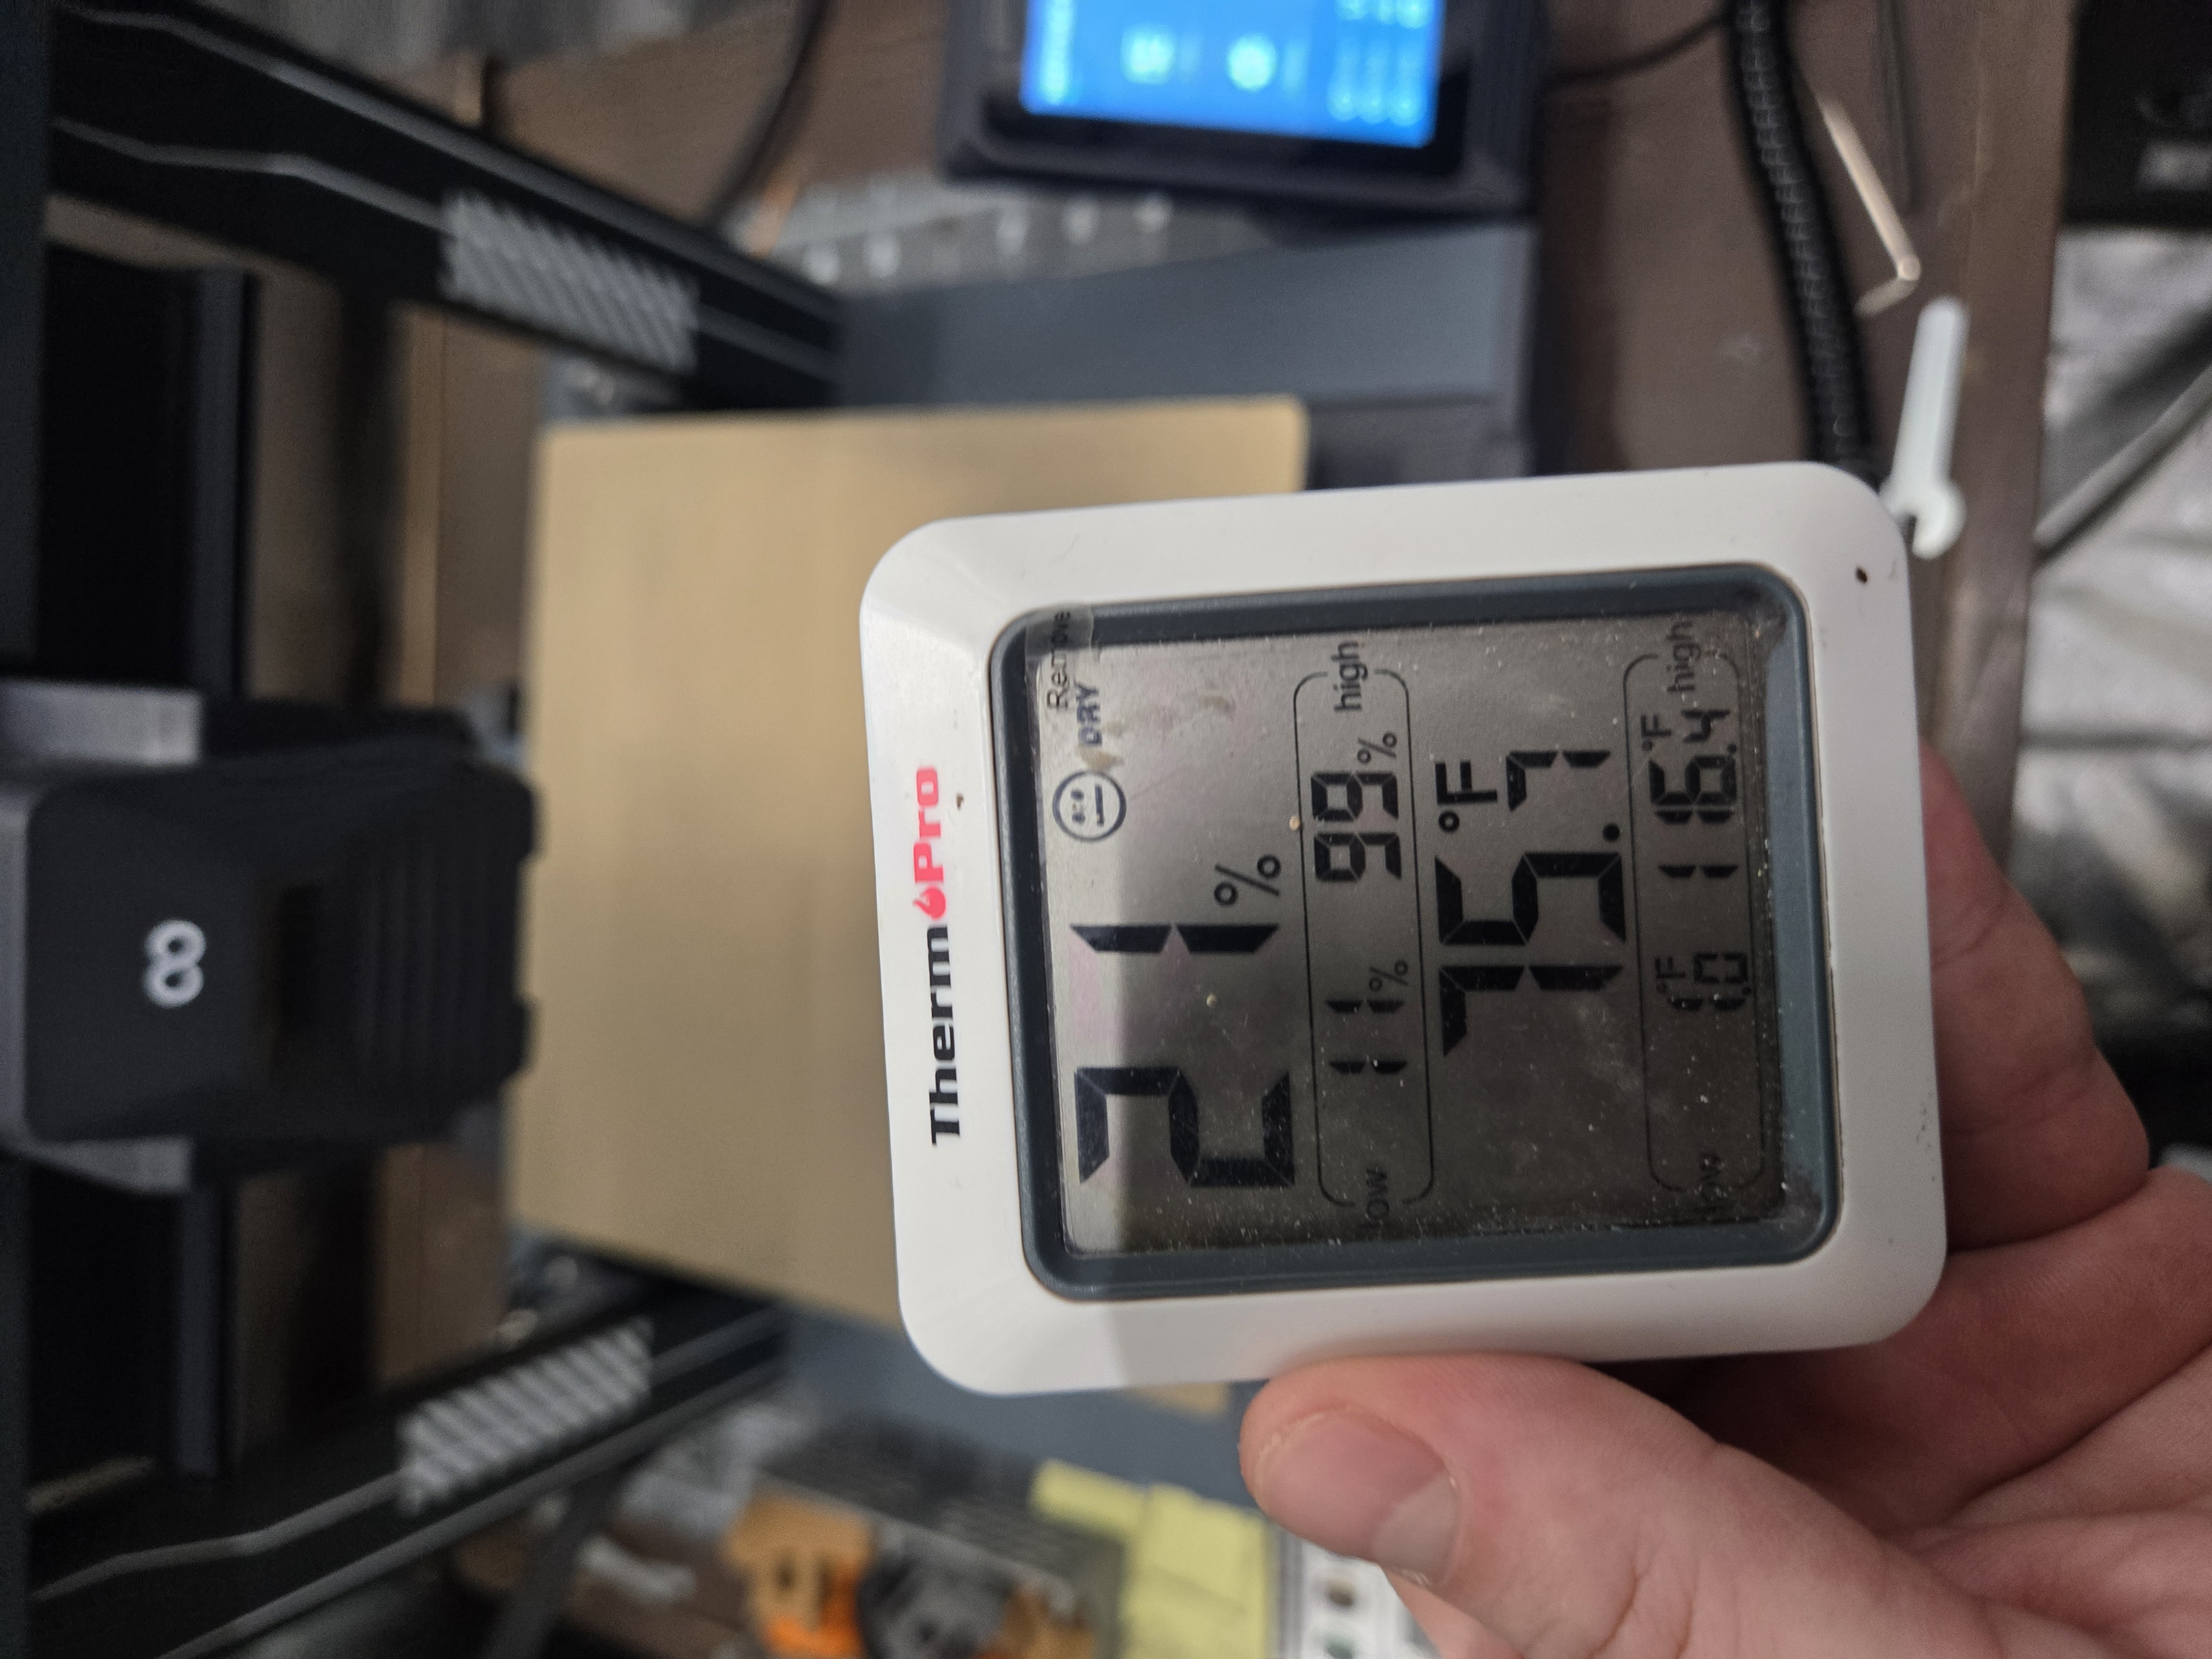
The humidity issue IMO is often overblown. It’s really environment specific. In my old place my relative humidity was 35% so wet filament was never a problem. It’d be good to get a hygrometer to see where you’re at before you start buying fancy filament dryers or accidentally melting your spools in the oven. If your area is generally high humidity then it can help. With PLA though it’s not going to make a huge difference.
My humidity in my little printing enclosure is sitting at 21%, so it seems like this probably isn’t the major issue. Thanks for the info, the other perspectives definitely help.
Hard to know what’s going on without pictures. Could be any number of things. My first thought is over-extrusion if the nozzle is catching your print and knocking it over. Or maybe you need Z hop between layers. I’ve only used Prusaslicer so can’t say what to do to help in Cura. If you’ve completely replaced the hot end, you should be re-tuning your printer (PID tuning for correct temps, e-steps for correct extrusion amounts, etc). If it’s adhesion problems where the print isn’t sticking to the bed, applying some glue stick can help keep things secure.
Thanks for taking the time to reply, and with so many different options to try. It means a lot, I really enjoy printing so this has been bumming me out a lot. I’ll try to get some reference photos up after work.
Printing really is fun! But there’s so much to troubleshoot, it’s a time sink to get things right. My 2nd printer is down from a dead fan, one of these days I need to solder the broken wire back on.
But once your printer is tuned, oh boy it’s satisfying
Also, depending on the amount of contact area on the bed, you may want to try a brim. Taller items with a small contact patch can be prone to this.
Oh this for sure. Sharp corners? Brim. Tall print? Brim. Small contact area on the bed? You won’t believe it, but brim.
Good call. I tried the all options, and brim definitely helps get good consistent prints. It didn’t solve my problem outright but definitely helped when I was doing initial research.
- Double-check the bed leveling/z-offset even though you already did it.
- Clean the bed with soapy water.
- Get some PVA glue. Can be bought at the supermarket or hardware store. If you can’t remove the print after it is cooled down submerge it in water and a few minutes later the print will fall of on it’s own.
Can you elaborate on the process for using PVA glue? Do you put a thin layer on the future print area? Does it ‘cook’ at all on the bed? How is it better than using a gluestick which I see recommended pretty often?
Glue stick also contains PVA. Issues I had is that it stays sticky and cleaning the buildplate can be difficult.
With a pure or close to pure PVA-based slurry/solution it dries up to a film and as such isn’t sticky to dust and finger but still sticky to filament. Further, it can be easily cleaned up with water.
How to apply it? Brush it on. If there isn’t any brush nearby I spread it with my fingers.
I was a little confused at first but this is a great explanation. Haven’t seen this tip mentioned elsewhere before!
Relevant Pictures:

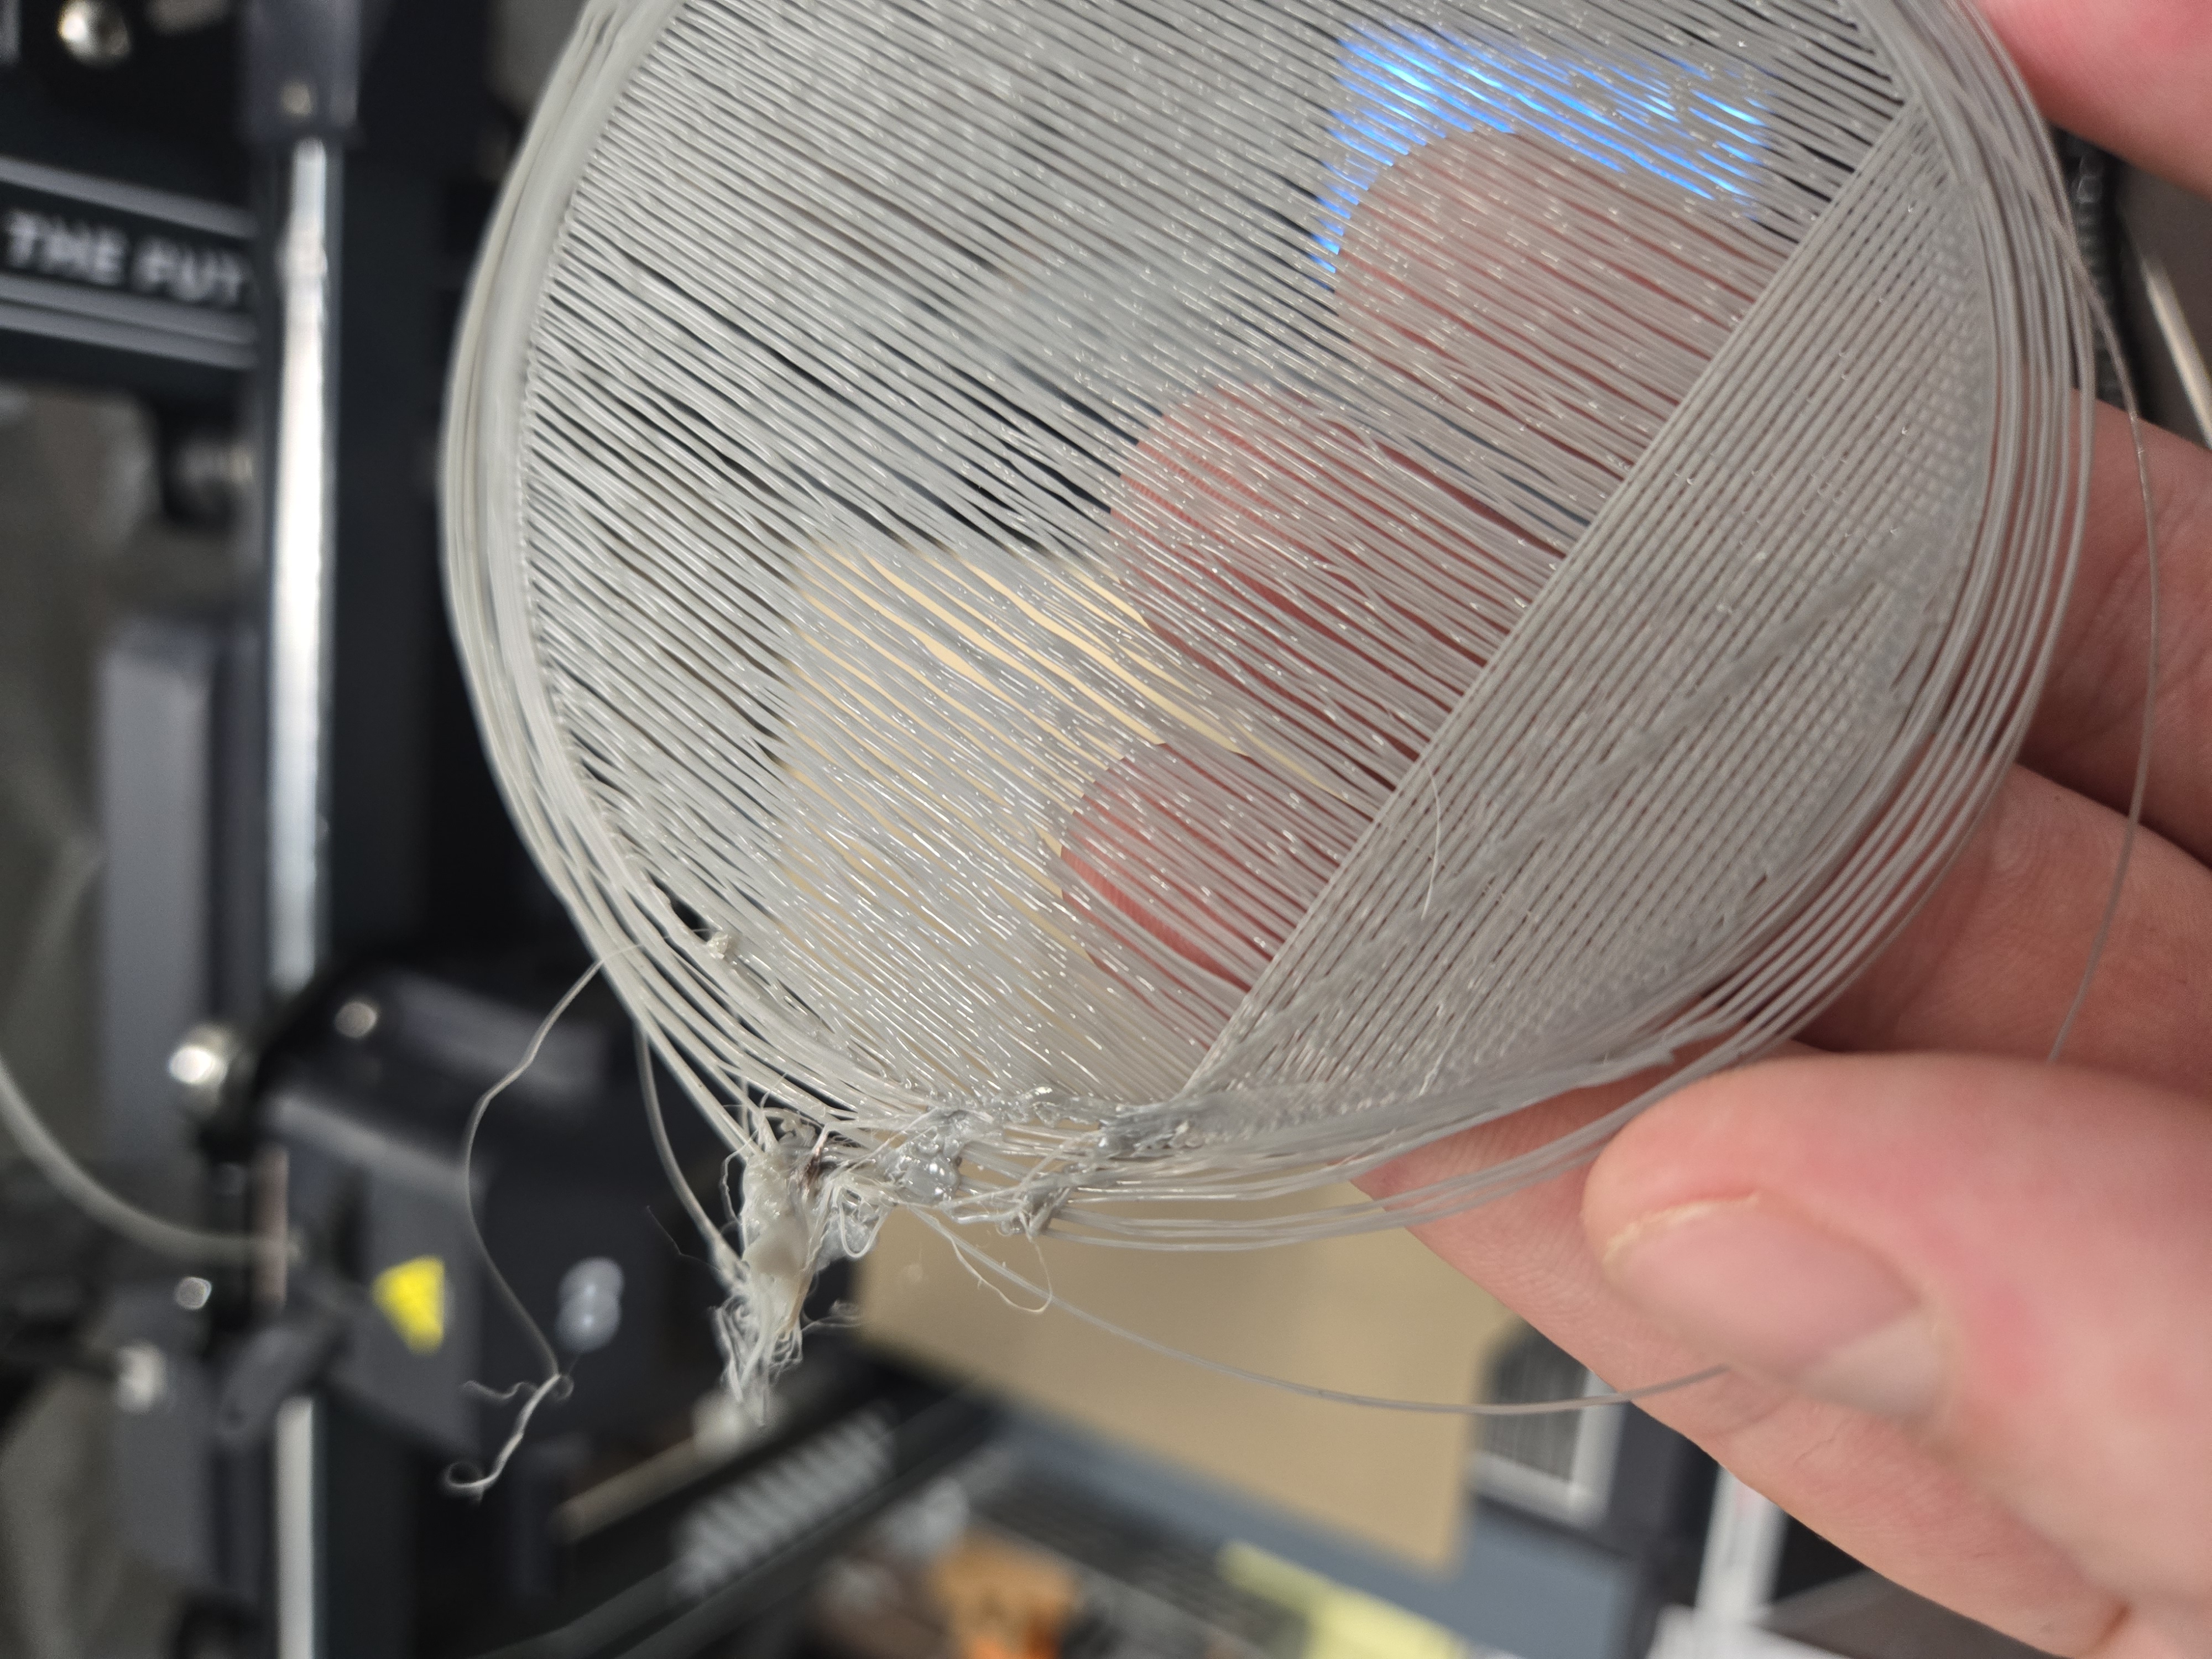

Going by just the failed circular print, you definitely don’t have a good Z offset. There’s no smoosh there. Putting it lower will smoosh the filament into the print bed (Part of why the PEI sheet is textured. The filament smooshed in the texture helps hold it better than a flat print bed). The fact that you can see through your first layer is bad.
The top layers of your other failed prints look good, so I say we can rule out under/over-extrusion.
I agree with this. OPs adhesion is almost non existant, printed model being dragged around with nozzle.
Get nozzle much closer to print bed. Print the first layer slowly with no fan, stop and repeat until its perfect, then continue with 2nd layer. There shouldnt be any gaps between lines (too far), but surface should be smooth with no ridges (too close)
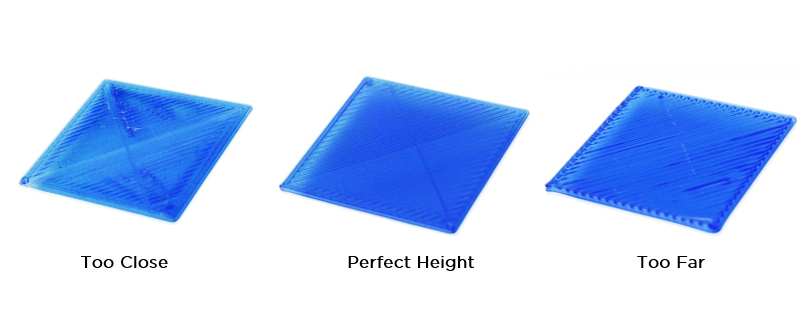
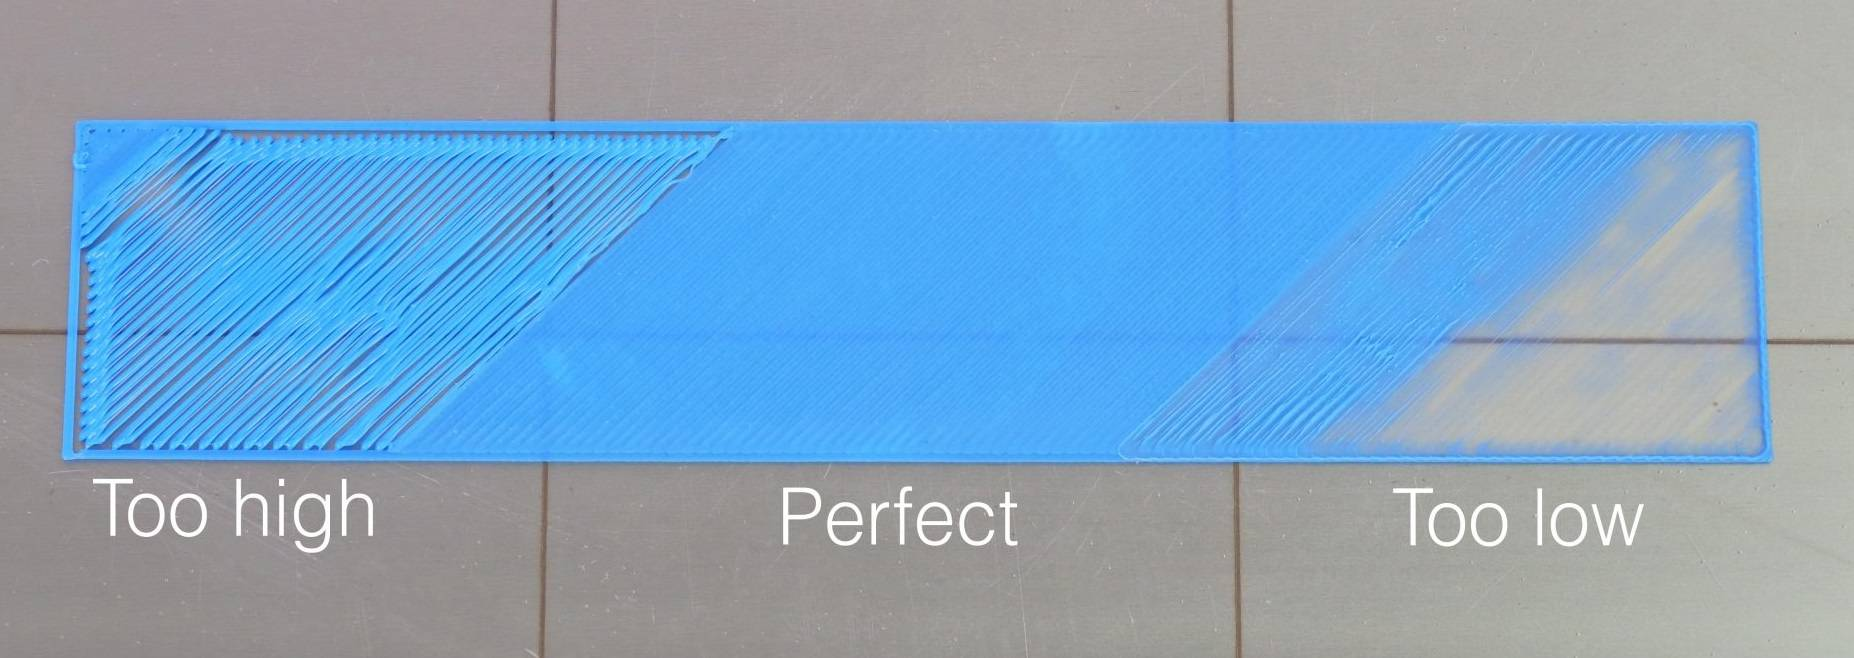
There are some other tricks to improve adhesion even more, but first layer should be fixed first
Printing the 1st layer slow is so important, forgot about that! I’m down to 25mm/s on my first layer. Nice and slow. A print with a large surface area (Like a sign) may take 15 minutes on the 1st layer, but it’s definitely worth it.
This was the final key, just bringing it WAY closer to the build plate. My first test print turned out much better
 I see what you mean by smoosh being missing.
Lowering the Z Offset, Cleaning the build plate, using “fresher” filament, adding a brim support layer, and checking the nozle for built up filament seems to be the checklist to follow.
Appriciate the help, Lemmy was a last resort. Hopefully someone else can stumble upon this thread if they’re having issues.
Much better, but noozle should still be bit closer
got it, more test runs to follow.
If that’s the 1st layer we’re looking at, you can get even closer. You want all those lines to be merged with each other.
Just ran a disk like yours as comparison. You have to look pretty close to see the individual lines!
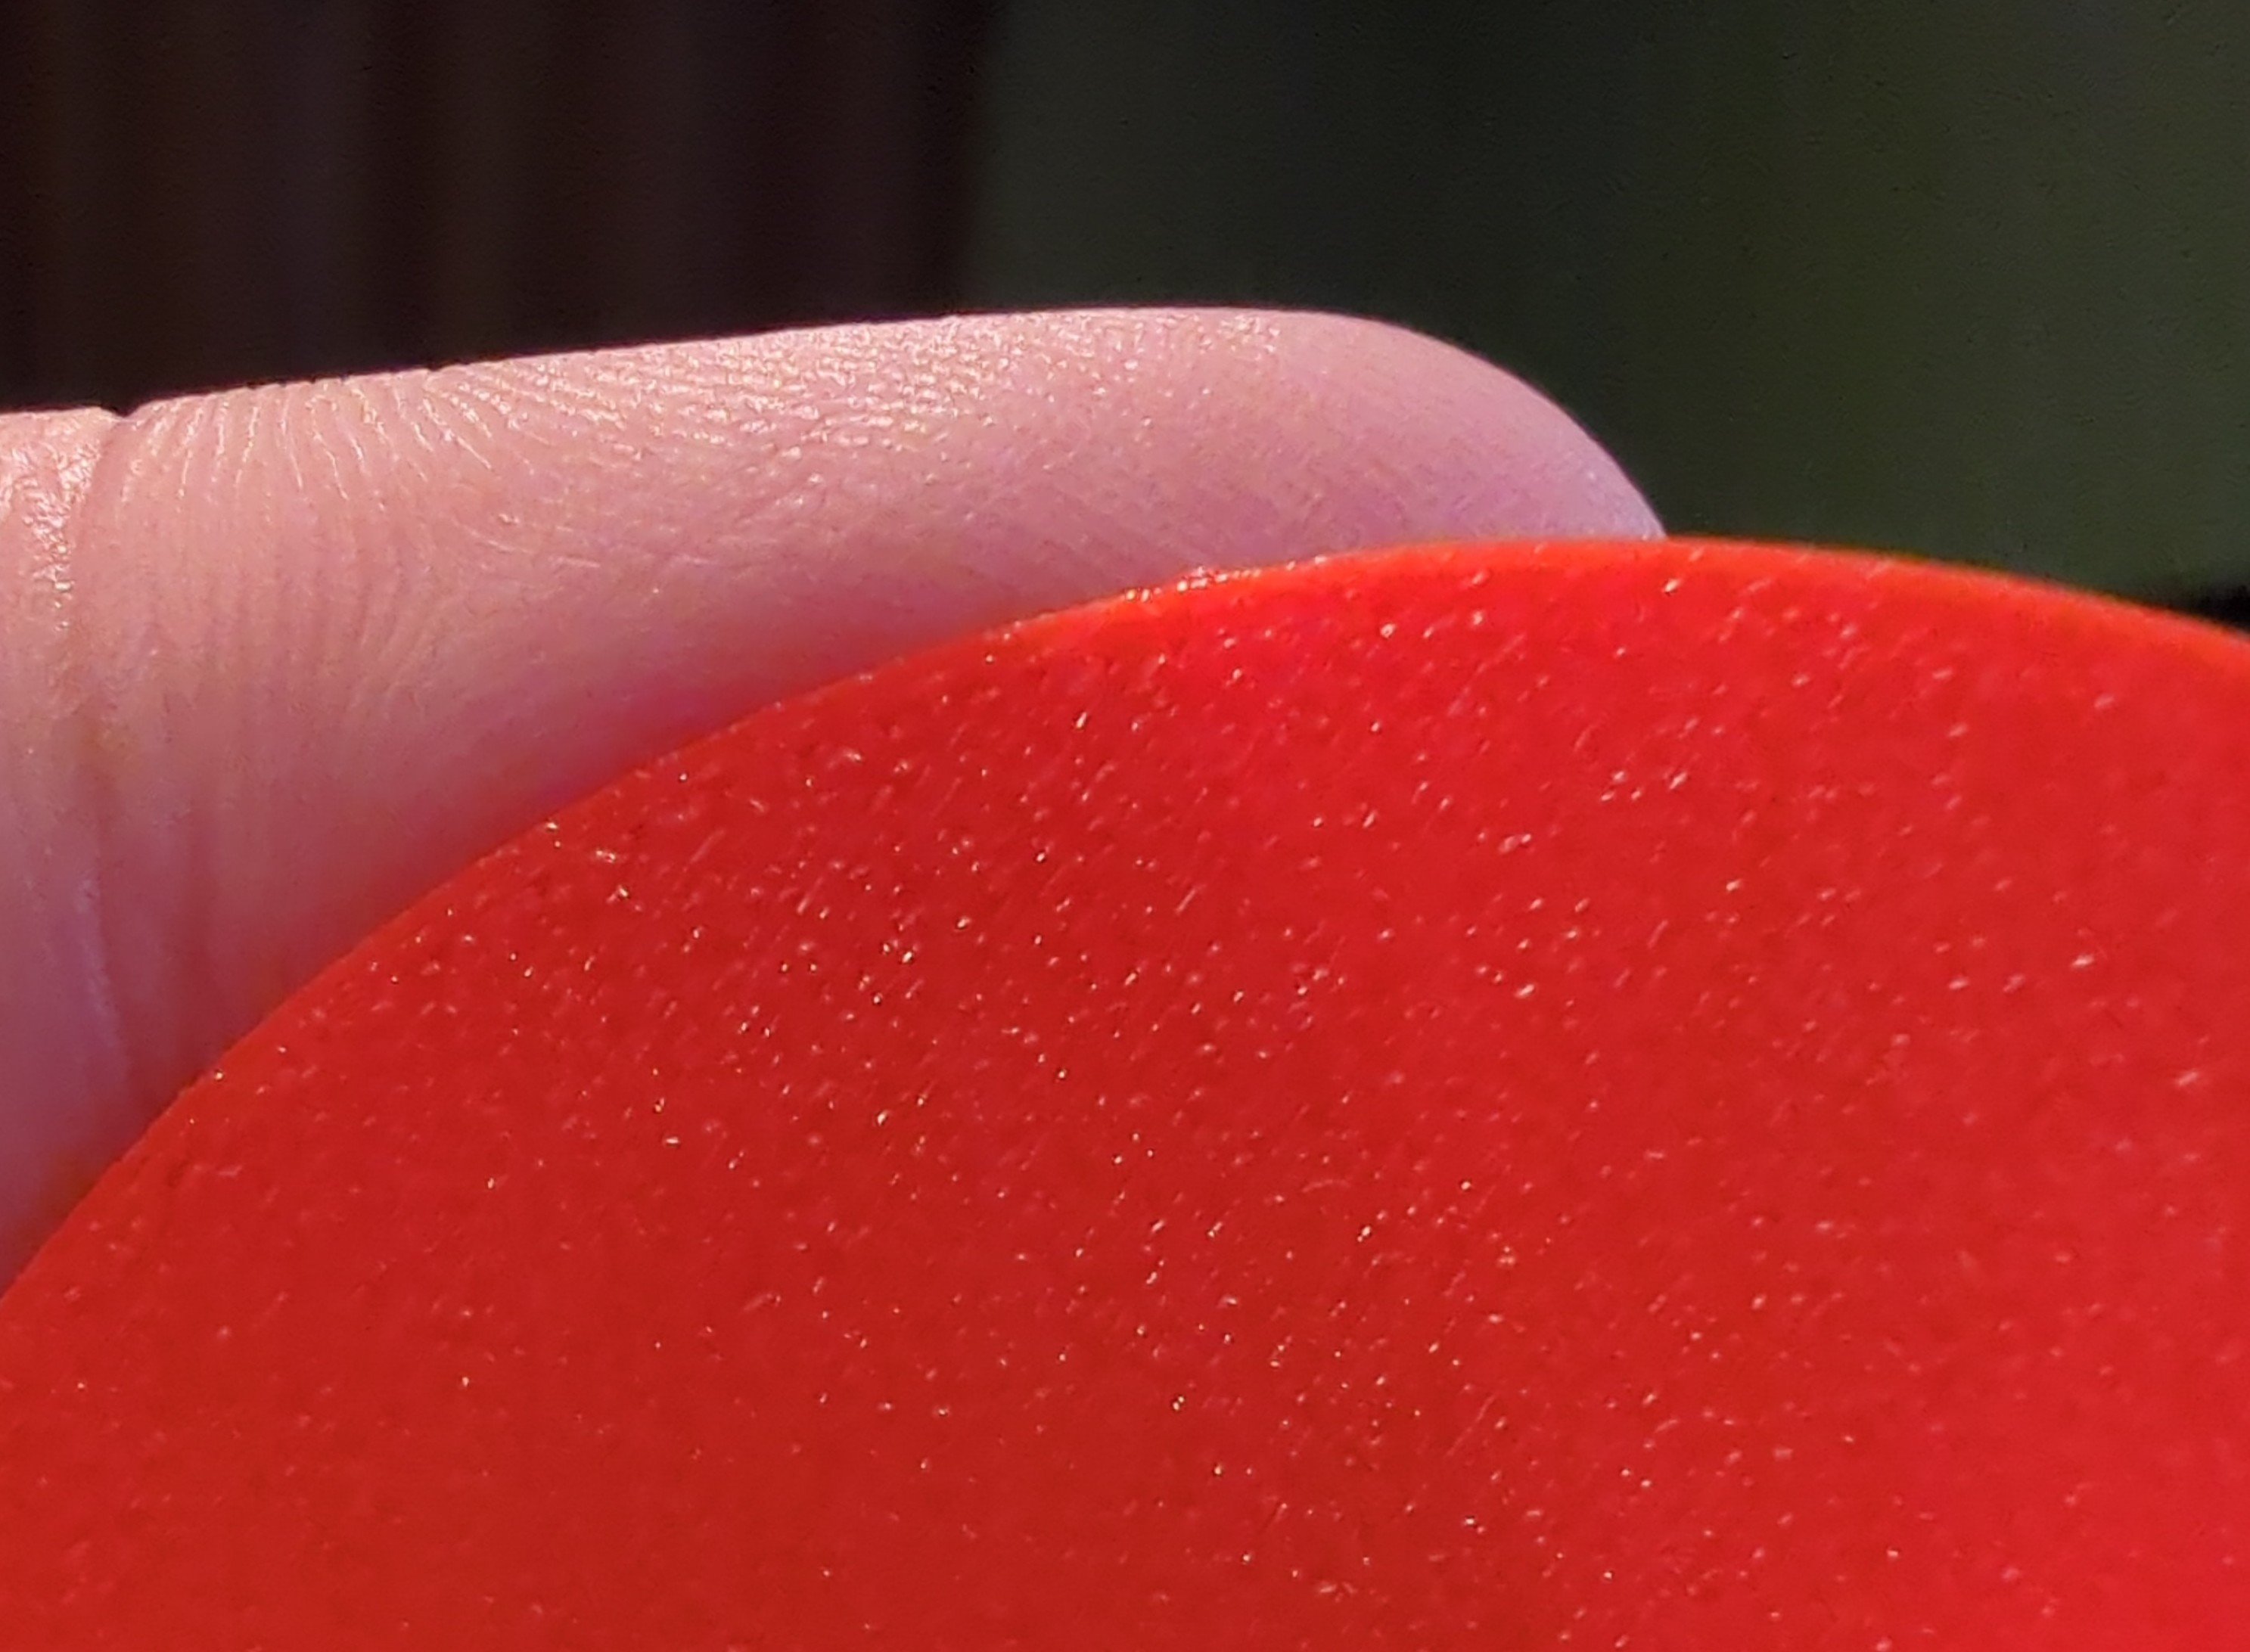
Spent time printing last night and I was able to get a first layer that looked extremely similar to this. Was able to successfully print some smaller things (1 hour print time max). Scared to test a longer print honestly, mostly because if it still doesn’t work I’m just at a loss.
Side note, that red is super vibrant looking. Gonna grab some now lmao.
It’s actually orange! But yeah, super vibrant. My favorite brand is IIID Max, their PLA+ is very vibrant

