- 3 Posts
- 23 Comments

 1·8 months ago
I did just check to see if you can pass along wildcards in an automation, which you can! I used this automation:
alias: sentence test
description:
trigger:
  - platform: conversation
    command:
      - When is [my] {date}
condition: []
action:
  - set_conversation_response: curses, that damnable {{ trigger.slots.game }}
    enabled: false
  - choose:
      - conditions:
          - condition: template
            value_template: '{{ ''birthday'' in trigger.slots.date }}'
        sequence:
          - set_conversation_response: >-
              curses, that damnable {{ trigger.slots.date }}! It completely
              slipped my mind
      - conditions:
          - condition: template
            value_template: '{{ ''christmas'' in trigger.slots.date }}'
        sequence:
          - set_conversation_response: sir you know when {{ trigger.slots.date }} is!
This should give you a framework to build off of. It looks like when you don’t define a list of slots in an intent it just passes the wildcard along in a slot.

 1·8 months ago
I can think of a couple ways you could have it be one automation, the first is you’d have multiple triggers with different ids and use the choose action to select the response based on the trigger id.
The other way that I’m a bit less sure about is passing the name of the input_date helper through to the response with a wildcard. You’d probably have to set the {{ trigger.slot.event }} as a variable and match that to an alias or an entity_id.

 1·8 months ago
So I found this which might help. I tried defining my own intent scripts too, but it was too much of a PITA, I ended up using automations instead.

 4·8 months ago
Ardumower is the one I’ve always intended to roll with. Eventually lol. The original nav method is a buried perimeter wire, but they do offer a GPS-RTK kit.

 2·9 months ago
Hell yes, Orna is perfect.

 4·9 months ago
Someone is working on replicating echo show functionality in home assistant, it’s called View Assist.

 2·10 months ago
I had the same issue myself when I added my bltouch to my CR-10v2. Maybe check YouTube videos for GitHub links? I used the 3dprinting Canada video which had a link to a firmware build that worked.

 1·10 months ago
Aha! I did some more digging and I figured out how. I wasn’t sure if you could just spin off new custom attributes in customize.yaml but according to this gentleman and scholar turns out you can! So everything is getting a normally closed attribute.

 1·10 months ago
Ope, that’d totally work. Definitely would be easier to impliment than what I was gonna do, which was try to add a custom attribute to identify normally closed or normally open.
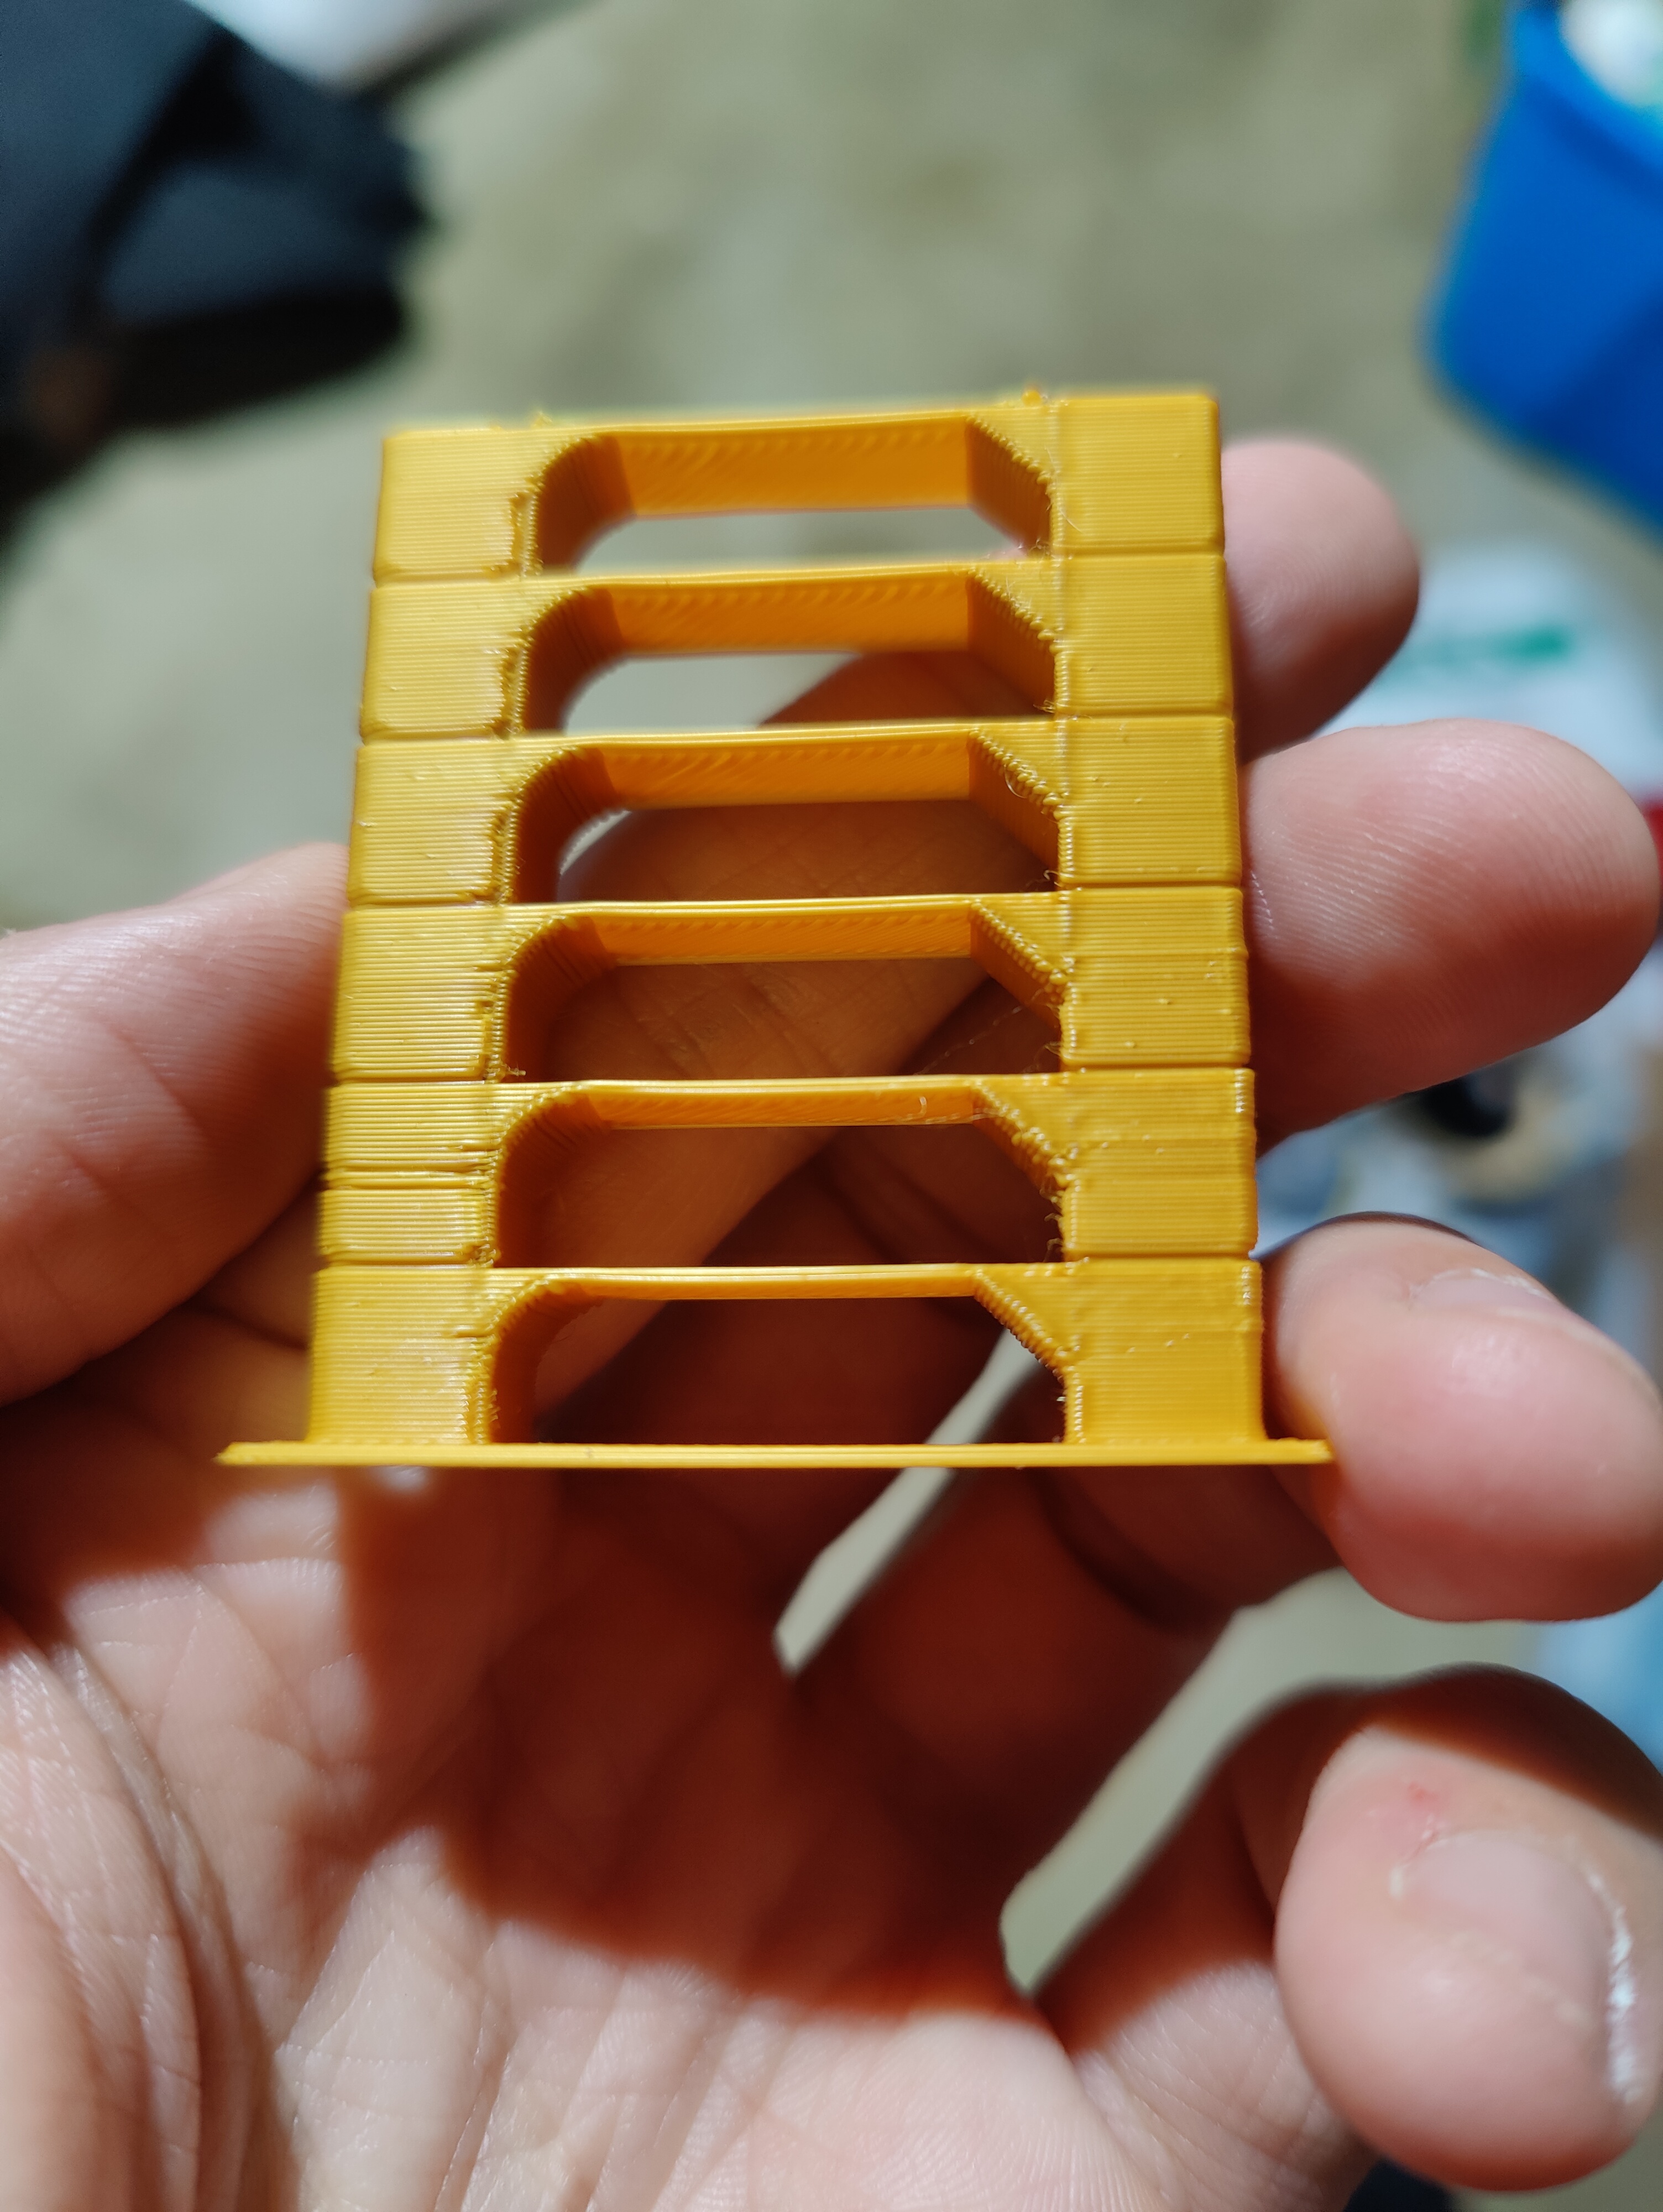
It’s definitely sagging, this happened as I was composing the OP:

That’s the worst I’ve seen, usually it’s like the original picture… Oh damn I just noticed it happens at the same layer heights every time.

Hmmm, so why would this filament give me trouble and not the other one? Or is this a z-axis issue or a slicer one?

 1·1 year ago
I’ll definitely need to check this out, thanks!

 1·1 year ago
Ooh this is exactly what I’ve been looking for, thank you!

 1·1 year ago
It did! And it is pla. It did change, I used kartchnb’s auto tower addon. The bridging looks pretty good on the first few sections but the layers didn’t bind on the upper sections. Honestly 220 looks the smoothest for that and the overhangs.

 1·1 year ago
It did actually change the temp! It’s the auto tower addon for cura, all I had to do was select the model and hit print. Plesantly surprised, last time I made one it was a bit of a slog.
Also yes it’s very weird, I’ve no clue why.

 7·1 year ago
It’s managed to get beyond 200C this time! But it did fail at 190°, though that’s the low end of the temp range anyway.

Back looks… Okay. I’m assuming that’s the Z-seam on the inside of the arch. Bridging looks best on 220°, and I don’t know what the deal with that line in the middle of 215° is, best guess is under extrusion by way of friction but idk. It broke apart right where it thins out between 205° and 200° too, so that might be my lower bound.

 1·1 year ago
I think he’s talking about having a bridge separate from home assistant vs using the zha integration. The former setup will let you control your lights when home assistant is down, the latter will not.
I just moved from the former to the latter and it’s life changing lol. Added bonus of moving to z2m is binding devices directly to other devices inputs, like switches and motion sensors.

 1·1 year ago
I’ve had my eye on this one ever since I saw it on Reddit years ago: https://www.3dchameleon.com/
It uses switches on the z-axis to kick off the filament change, not sure how it deals with stretched filament.

 1·1 year ago
So you’ve got a few main varieties of printing technology (detailed here). As for your requirements I’m not sure there’s enough metal in the metallic filaments to trigger a metal detector, but this article should be a good starting point for you.

No problem! I’ve been puttering around trying to figure this out and this post gave me the push I needed lol